How To Use Alight Motion – Expert Guide For Beginners 2026
Video editing has become easier with mobile apps, and Alight Motion is one of the most powerful tools available for beginners and advanced users. It allows you to create animations, edit videos, and design motion graphics directly on your phone. Many new users open the app and feel confused because of its features and interface.
Without proper guidance, it becomes difficult to understand where to start and how to use each tool correctly. This guide will help you understand how to use the app step by step. You will learn how to set up your project, add media, use basic tools, and create simple edits in a clear and practical way.
You may also like: Add and Copy Effects in Alight Motion
Getting Started
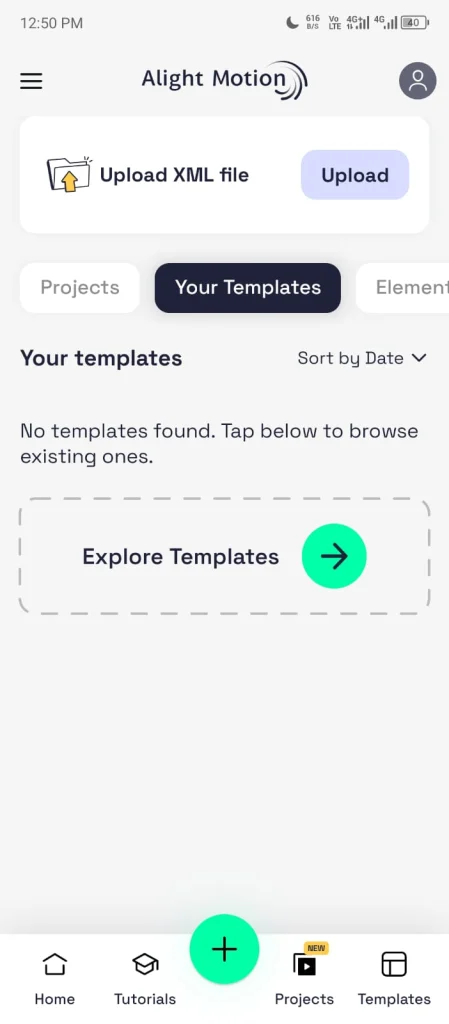
To begin, you need to install the app and create your first project. You can download it from your preferred source or directly from https://motionalightdl.com/. After installing, open the app and you will see the main dashboard. Tap the add button to create a new project. You will be asked to choose settings like resolution, frame rate and background color.
Choose settings based on your purpose. For social media videos, a vertical format with standard frame rate works well. You can always adjust settings later if needed. Once your project is created, you will enter the editing screen where all the work happens. This is where you add media and start building your video. Getting this step right makes everything easier later. A properly set project saves time and avoids problems during editing.
Understanding the Interface
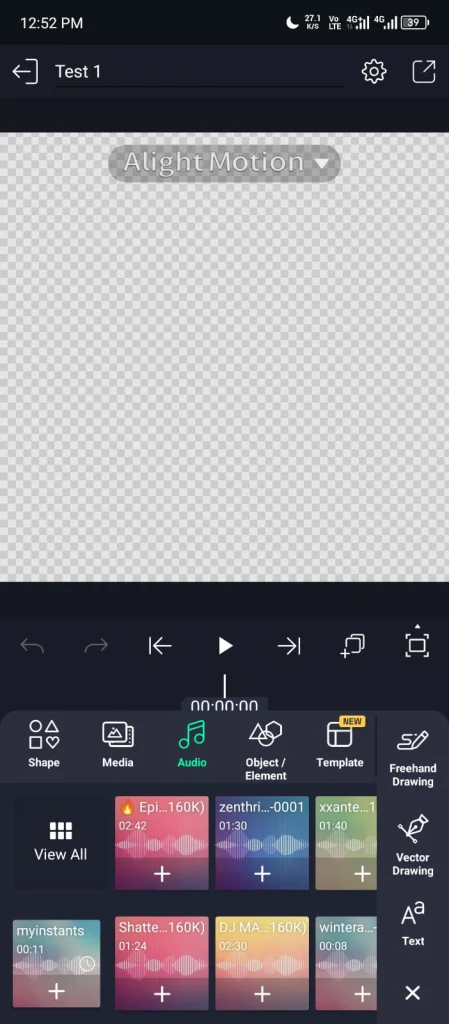
When you open the editing screen, you will see several sections. Each part has a specific role, and once you understand them, editing becomes much easier. The preview area shows your video in real time. Any change you make will appear here so you can check how your edit looks.
Read a complete guide about the Basic Tools in Alight Motion
The timeline is where all your clips are placed. It controls when each element appears and how long it stays. This is the main area where editing happens. The layers panel shows all items in your project. Each video image text or audio appears as a separate layer. You can select and arrange them from here.
The toolbar gives access to all main tools. From here you can add media, apply effects and adjust properties. At first it may feel complex, but each section works together in a simple way. Once you spend some time using it, the interface becomes easy to understand and control.
How to Add Media
Adding media is the first step in creating your video. This is where you bring your content into the project. Tap the add option in the timeline area. You will see different choices like video image audio text and shapes. Select the type of media you want to use.
Choose your file from the device. Once selected, it will appear on the timeline as a new layer. You can move it left or right to control when it starts. If you are working with multiple files, add them one by one. Each file will be placed on its own layer which makes editing easier later.
Read this guide about adding and deleting media
You can also arrange the order of layers. Elements placed above will appear in front while those below stay behind. Adding media correctly helps you build a clean timeline. When everything is organized from the start, editing becomes faster and more controlled.
Basic Editing Tools
Once your media is on the timeline, the next step is to edit it. These basic tools help you control how your clips look and behave. You can move a layer to change its position on the screen. This is useful when placing elements in the right spot. Resizing allows you to make a clip bigger or smaller. It helps adjust visuals according to your design. Rotation lets you change the angle of a layer. You can tilt or spin elements to create different looks.
Trimming is used to remove unwanted parts from the start or end of a clip. This keeps your video clean and focused. These tools may look simple, but they are used in almost every project. When you use them properly, your edits become more organized and professional.
Introduction to Keyframes
Keyframes allow you to create motion in your project. They control how a layer changes over time, such as movement size or rotation. A keyframe marks a specific point on the timeline. When you add another keyframe with a different value, the app creates motion between those points automatically.
For example, you can place one keyframe at the start and another at the end with a different position. The object will move between those two points without manual effort. You can animate properties like position scale rotation and opacity. This gives you full control over how elements behave in your video. Keyframes may seem complex at first, but once you understand the concept, creating smooth animation becomes much easier.
Learn more about Keyframing in Alight Motion
Using Effects and Enhancements
Effects help improve the visual quality of your video. They allow you to adjust colors, add depth and create a more polished look. You can apply effects to any layer. Select the layer and open the effects option. Choose an effect and apply it to your clip.
Each effect has its own settings. You can adjust intensity, color blur or other values depending on the effect. Small adjustments usually give better results than strong changes. You can also combine multiple effects on one layer. This helps create a unique style, but it is important to keep everything balanced. Effects should support your content, not overpower it. Clean and controlled use of effects always looks more professional.
Simple Editing Workflow
A clear workflow makes editing easier and faster. Instead of using tools randomly, follow a simple order that keeps everything organized. Start by adding all your media to the timeline. Arrange clips in the correct sequence so your video has a clear structure.
Next, adjust each clip. Trim unwanted parts and position them properly on the timeline. After that, add basic animation using keyframes if needed. This helps create movement and improves the overall look. Then apply effects carefully. Enhance your visuals without overloading the project.
Finally, review your entire edit. Check timing, alignment, and overall flow before moving to export. Following this process keeps your editing clean and helps you create better results with less effort.
Tips for Beginners
Starting with a new editing app can feel confusing, but a few simple habits can make the process much easier.
Exporting Your Video
After finishing your edit, the final step is exporting your project. This process converts your work into a video file that you can share or upload. Tap the share or export option from the top menu. You will see different settings that control the output quality. Choose the resolution based on your needs. For most cases, 1080p gives a good balance between quality and file size. Frame rate controls how smooth your video looks. Common options like 30 fps work well for general use, while higher values give smoother motion.
Bitrate affects the overall quality. Higher settings keep more detail but increase file size. A medium to high setting is usually enough for clean results. After selecting your settings, start the export process. Wait until it completes, then check the final video to ensure everything looks correct.
Read about How to Render and Export
Bottom Line
Learning how to use this app becomes easier when you focus on the basics. Once you understand how to create a project, add media and use simple tools, the rest of the features start to make sense. The key is to keep your workflow clean and controlled. Work step by step, make small adjustments, and review your edits regularly. With practice, you will become more comfortable and start using advanced features with confidence. Over time, your edits will look more polished and professional.