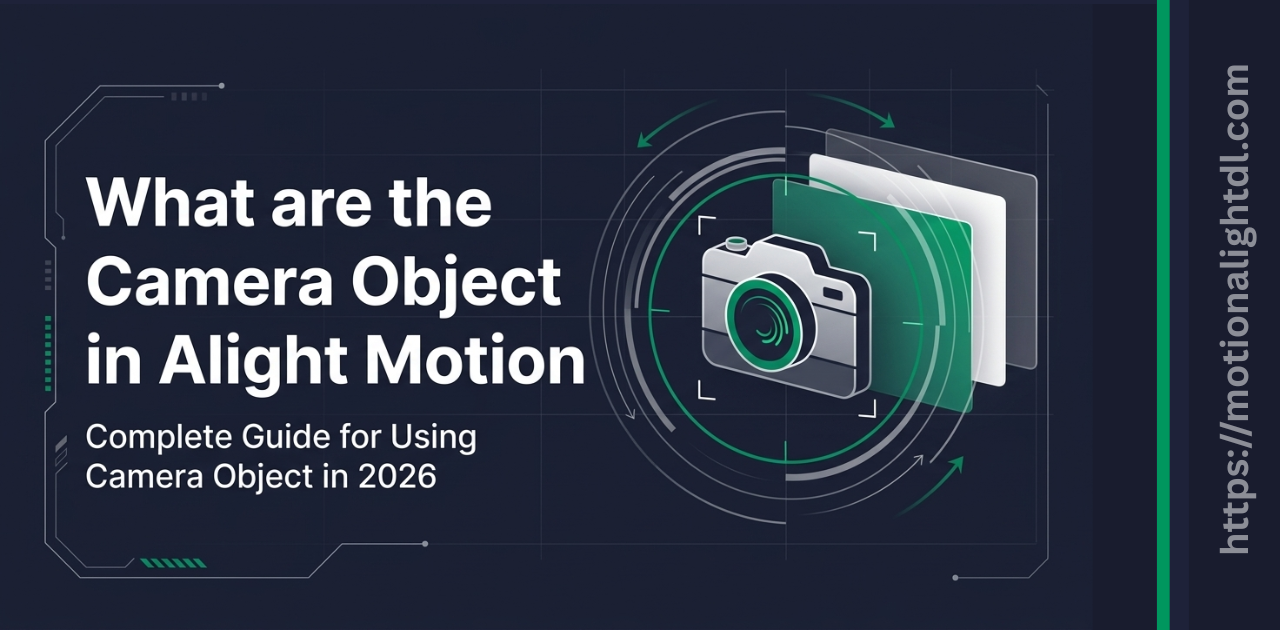
Camera Objects in Alight Motion – How to use it to create 3D & Cinematic Effects in Videos
Alight Motion is a powerful editing app built for smartphones. Using it, you can create high-quality, professional, and cinematic videos and animations on your Android and iOS devices. In today’s guide, we will learn about the “Camera Object in Alight Motion”. You can also check out a detailed guide on “Masking in Alight Motion“. Before we deeply learn the camera objects. First, let’s understand “What are camera objects and their usage?”
Camera objects help create realistic camera effects in your videos. It gives you full control over “how your viewers will experience your editing.” Using it, you can add depth to your videos, add blur and fog, create fluid camera movements, and make every scene of your video visually appealing and engaging.
Moreover, you can add panning, zooming in & out, and sliding to your videos using a camera. Using this feature, you can polish any boring video into something professional by adding life to it.
What are Camera Objects in Alight Motion?
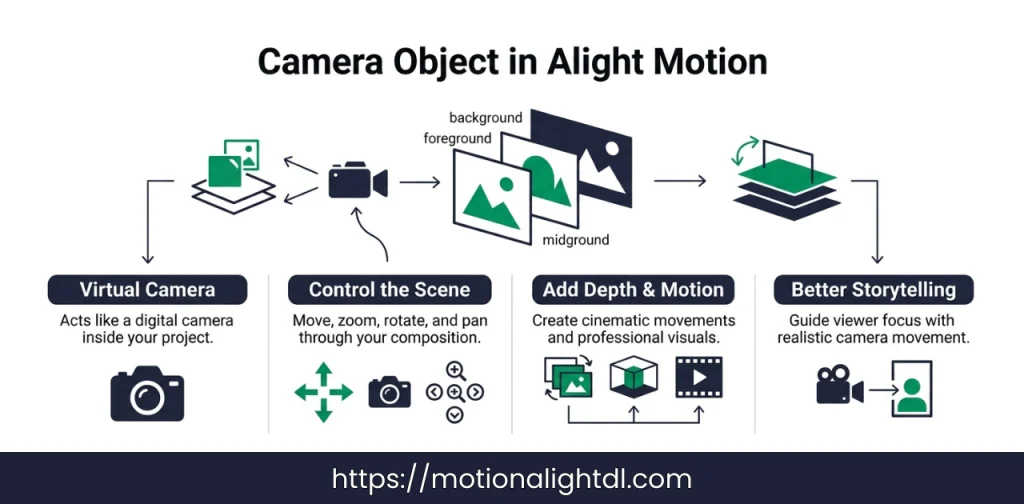
The camera object in Alight Motion acts like a virtual camera in your project. If you are working on a complex animation project, or your project is looking boring. Then you can use it to add life to your projects. Normally, when we animate objects in our project, we manually control each part of the animation, apply various effects and filters, and adjust properties.
Instead of animating each layer’s movement separately, you can use a camera object to move it through your whole composition and perform panning, tilting, rotating, scaling, and focusing, etc., like a real camera. The camera object in your project is like an invisible camera. Using it, you can do many of the things a real camera can. You can adjust its angle to add depth to your videos, focus on specific parts, etc.
The camera objects let you get unbelievable output results that can’t be achieved in normal editing. After playing with the Camera, you can export your videos in 4K quality, ad-free and watermark-free. One important thing is that when you work on heavy projects, you should use the camera object. Your Alight motion can lag or crash. To fix lag in Alight Motion, read this complete guide.
Creating Depth in Videos
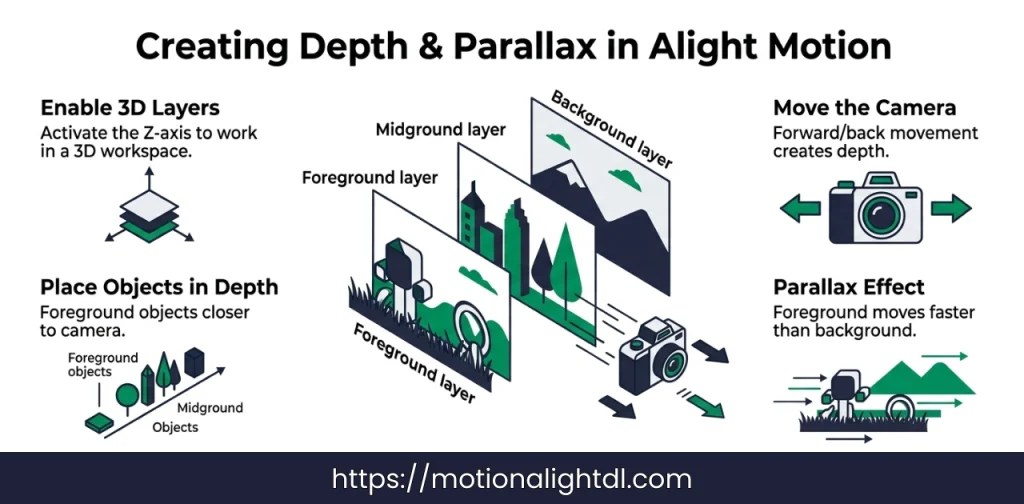
Using the camera object in your project, you can add depth to your videos, which adds dimension and realism. It allows you to work in a 3D workspace. Normally, you edit your project in only two axes, X and Y. But it will activate the Z-axis for adding depth and dimension to the videos. That means you can place your object near or far from the Camera freely, just like a real-world object.
When you move the camera object forward or backward in your project, it creates a parallax effect. The objects in the foreground will move faster than those in the background, creating realistic cinematic effects in your videos. For example, you can use it to create a film sequence by adding your text and titles to the foreground and placing other objects in the background as you move the Camera, creating a professional, realistic sequence.
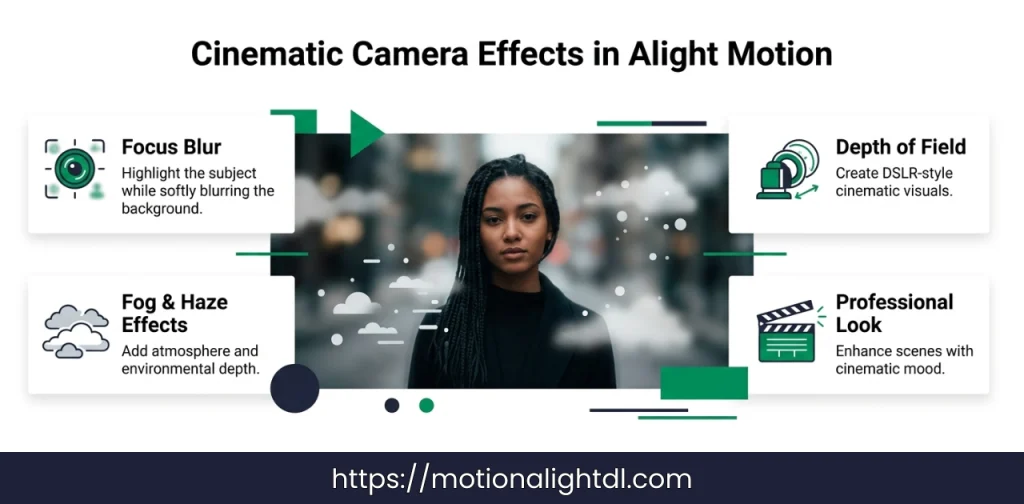
Adding Focus Blur
This is one of the most cinematic techniques, mimicking the DSLR’s shallow depth-of-field effect. Using Focus Blur, you can redirect the viewer’s attention to the key details of the object by focusing on the main object and softly blurring the entire background, just as a real DSLR camera would.
Moreover, you can adjust several settings for these effects by adding variations and cinematic effects to your visuals. These settings are blur strength, focal length, and aperture. This technique adds sharpness to specific objects while blurring the background, creating professional, engaging visuals.
Fog Effects
Using fog and haze in your videos will change their mood entirely. When you use them in your videos, they will naturally respond to camera movements, adding environmental depth to your scene. For instance, adding light mist to a sunrise clip will turn it into a cinematic & dramatic scene. You can make several adjustments to your clips, like adding filters and playing with color grading, to enhance them further and make them more professional. In simple terms, fog effects create environmental depth in your scene, such as mist, haze, and particles.
Using Keyframe Animations
Keyframes are the most important part of creating smooth animations for your clips. It allows you to control the camera movement accurately. You can set multiple keyframes at various points in your timeline to animate the Camera’s pan, zoom, scale, and Rotation seamlessly. For example, with keyframe animation, you can start with a wide shot and zoom in to reveal the brand or product logo. Using the graph editor, you can tweak the animation’s curve and adjust its timing and flow for a more professional, engaging look.
Using Parallax With Parenting
Parallax is an illusion technique used for layers that move at different speeds. This technique can be achieved by using the parenting feature.
This technique will create your scene in a multidimensional way. It can be used for travel videos, montages, and other content that require visual depth.
How to use a camera in Alight Motion?
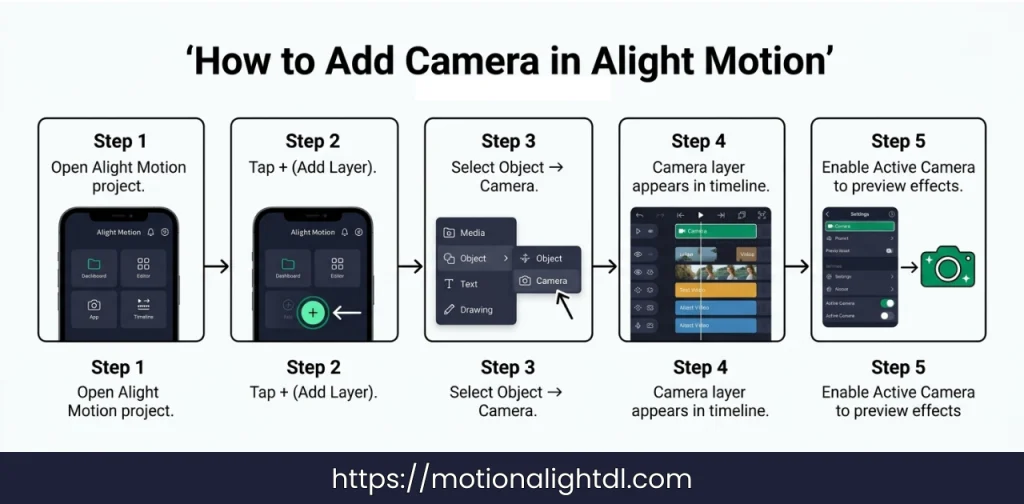
Here are the steps to add the camera object in Alight Motion:
Now you are ready to add various camera effects to your project, such as Panning, Zooming, Rotating, and Blurring. You can add multiple camera objects to create multiple parallax effects for your videos.
Using Active Camera
By default, it will be turned off. You have to enable it manually by following these steps:
The active Camera is used to preview the entire scene before exporting it. This is used to identify the scene “how it will look to your viewers”. Active Camera is widely used for complex scene edits. Where you have used multiple camera effects.
Customizing Camera Features
The camera object in Alight Motion offers many customizable settings. By tweaking these settings, you can get incredible results from your scene. These settings include Rotation, zoom, and effects. All of those camera settings are mentioned below.
Move, Rotate and Zoom
The Camera can be moved in all positions and along all axes (X, Y, and Z). You can rotate, pan, zoom in & out and scale to get visual depth and various cinematic scenes. Moreover, you can add the keyframes to the camera movements and effects. This allows you to get professional, cinematic and visually appealing 3D shots.
Camera Settings
In camera settings, you will get several parameters. Camera parameters are mentioned below:
Play with these camera settings until you get something professional and as desired, according to your imagination.
Effects and Presets
Alight Motion allows you to add various camera effects and presets to your projects. These include Cinematic Blur, Lens Flare, and Vignette. By adding these effects, you can change the whole vibe and mood of your videos.
Final Words
The camera object in Alight Motion is an advanced editing tool that can turn your boring, dull visuals into professional, unique, and cinematic visuals. You can play with the Camera Movements and various effects like Focus, Blur, Zooming, and Tilting. You can add environmental and visual depth to your videos. In simple terms, you can do anything unbelievable and magical with your videos that you never imagined.